If you’re a game designer or publisher still scrambling for a foothold, your first game might not sell more than a couple thousand copies. In such situations, the cost of injection molds for your games’ miniatures is daunting. “Simple molds are typically in the $3,000 and $6,000 range.” [ICOMold] Panda tells me that, for Emblem’s 55 total miniatures, with 17 unique shapes, I’ll need to sell around 40000 copies of the game before injection molding becomes less expensive than chipboard. Polyresin will never be cheaper than chipboard, no matter what the volume. And using 3D printing might save some setup costs, but there’s still the up-front skill investment in learning to do 3D modeling.
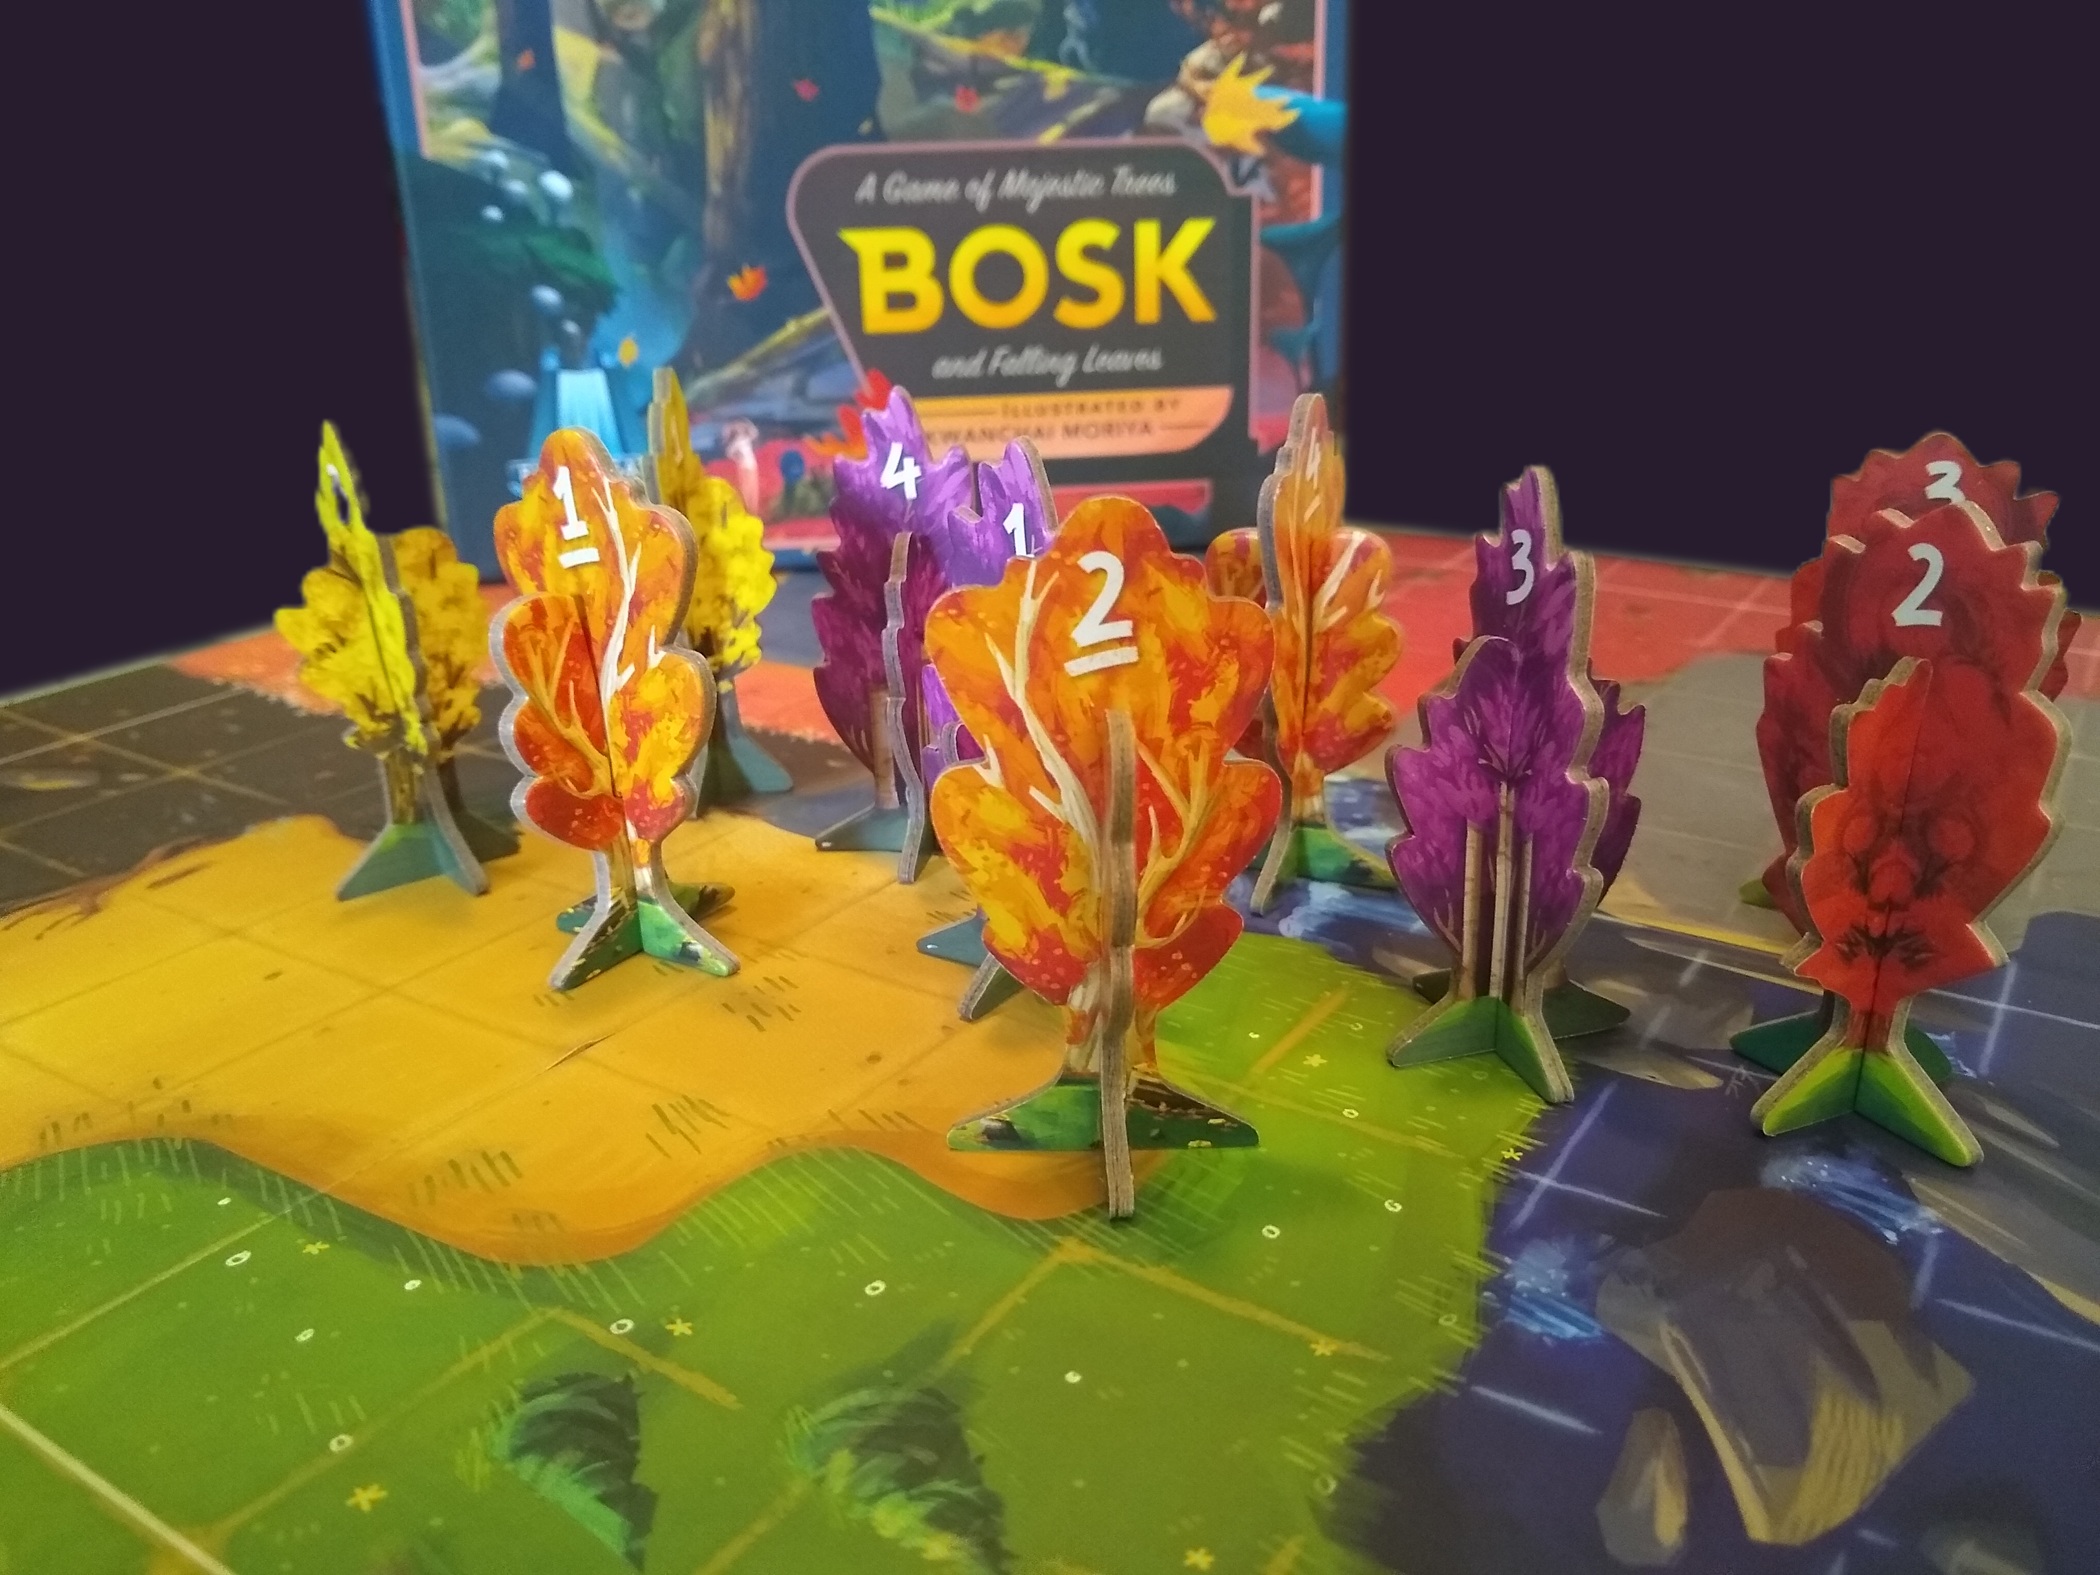
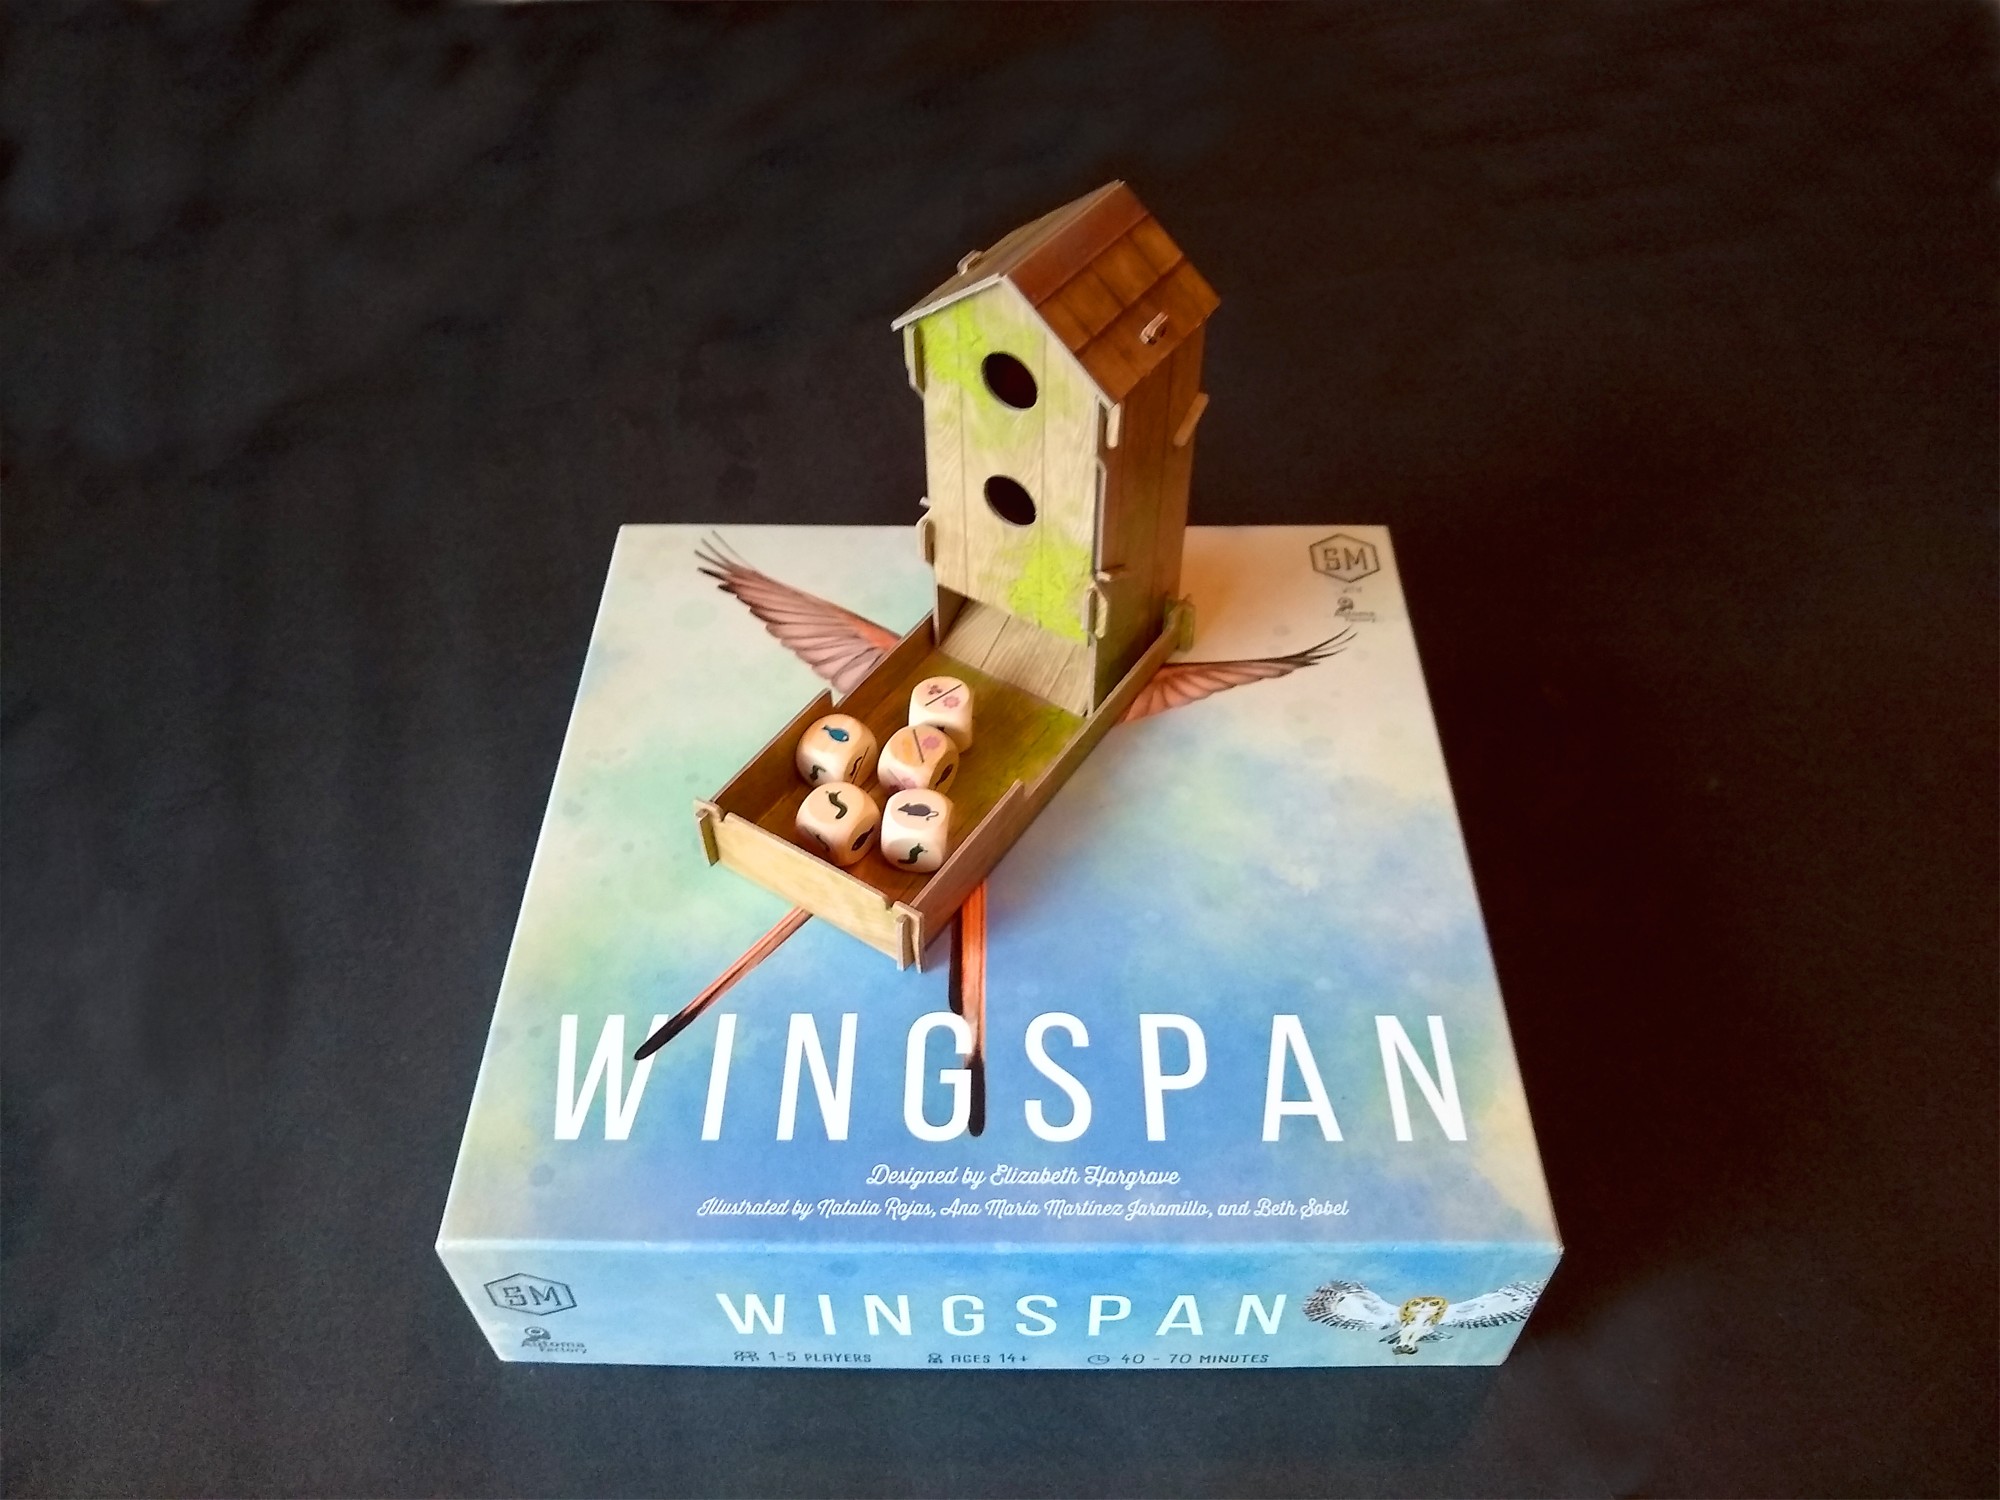
Or you could go the chipboard standees route instead. These are small pieces of chipboard that fit together to form a 3D structure. Examples include the trees of Bosk, above, as well as the dice tower of Wingspan, below. Chipboard standees can enhance table presence (e.g., the Everdell tree), improve the tactile experience of a game (e.g., as in Photosynthesis or Bosk), enhance durability (vs cardstock), serve mechanical functions (e.g., shaking dice as in Wingspan or holding other chipboard bits as in Kodama 3D), provide little storage areas for mini-cards (e.g., as in Meadow) or tokens (e.g., Materia Prima), and provide cool objects for players to move around (e.g., as in Rajas of the Ganges), including components that can hold components (e.g., Colt Express or Merchants Cove).
Prototyping
The Wingspan tower didn’t start out as a chipboard prototype. Instead, the designer (Elizabeth Hargrave) created a prototype out of foamcore. This is a type of board that has paper on the outside and polystyrene or similar material on the inside; you can get a big sheet of it for a buck or two. It’s very easy to cut with a razor or a good pair of scissors.
(Note to designers: When submitting a game to a publisher, don’t just wave your hand and say, “Gee, you know, this could be a chipboard structure.” Instead, create and playtest a physical prototype.)
The video below demonstrates how to assemble a really high-quality prototype. My key takeaways: Use Bristol board, use a luer lock needle tip to squeeze out only a tiny bit of slightly-diluted Elmer’s PVA glue, use tight corners to introduce tension, and use blue painter’s tape to hold the structure tightly while the glue dries.
Designing with Chipboard
When you design your final models for production, you’ll generally aim for chipboard. In low quantities, manufacturers typically cut chipboard punchouts from a “slug” of chipboard using a laser. In larger quantities, manufacturers can create a custom die to cut your chipboard pieces. Therefore, in addition to providing files that will be printed on each side of the chipboard, you also need to provide a file that tells where the laser or die should cut.
You’ll generally create this special file using Inkscape, Adobe Illustrator, or another tool that supports vector drawing. Save your file in SVG or PDF format, depending on your manufacturer.
You can put more than one chipboard piece onto each slug. However, you’ll need to be careful that the pieces aren’t located too close to one another. Typically, you want to keep your lines 6mm or 1/4″ apart.
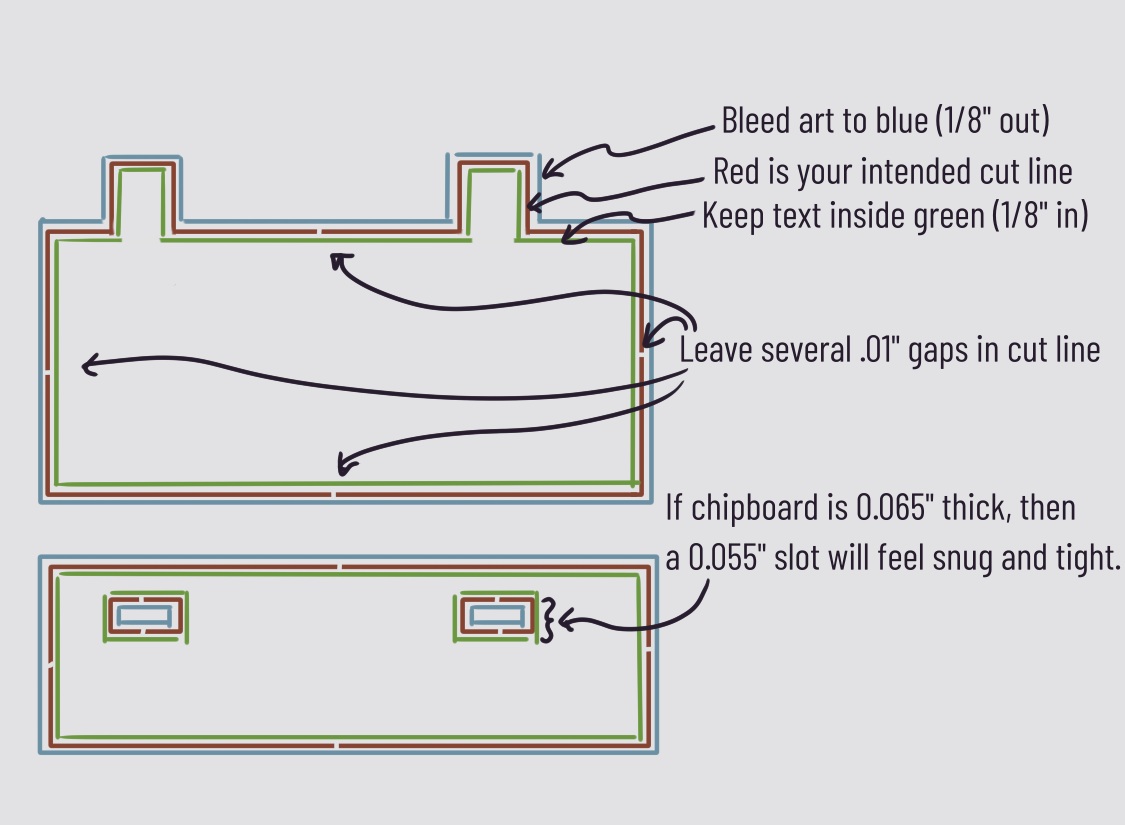
Each piece that needs punching out will need a few .01″ gaps in the cut line, called nicks. That way, there will be little bits of chipboard that tie the punchout to the rest of the chipboard.
Don’t make punchouts smaller than 8mm in any dimension, both due to the necessary internal margin (see below) and because people can’t manually handle such small punchouts well. Protruding edges should be at least 3mm outward to get a clean cut.
When you are creating punchouts that should fit together to form a rigid structure, you’ll need to cut little slots so that the pieces can fit into one another. The Game Crafter has a little article about standees that applies for this situation, as well (not just for standees). They also have a long article about how to use Inkscape, Illustrator and their proprietary Component Studio SVG tool.
Finally, especially when designing for a manufacturer that will cut with a die (rather than a laser), remember that cuts don’t always land exactly where you intend. Don’t put any important information closer than 3mm to a cutline. In addition, make sure that the artwork of a punchout bleeds at least 3mm (1/8″) outside of the line. For the same reasons, keep your cutlines at least 6mm from the edge of the slug.
Saving money
Here are a few additional tips gleaned from a few sources that might help reduce costs.
First, at the outset before you even pick up foamcore, look at your potential manufacturer’s slug sizes. Then, work backward from the manufacturer’s requirements. That way, you won’t inadvertently design an excessively large building. For example, The Game Crafter lets you go up to 8″ x 4.5″ on their medium punchout.
Second, especially when your manufacturer will use a laser, minimize the number of inches of cutting required. The shortest distance between two points is a straight line. Points 1, 2, 3 and 4 are the same in the two designs below, but the lefthand design will cost less than the righthand design.
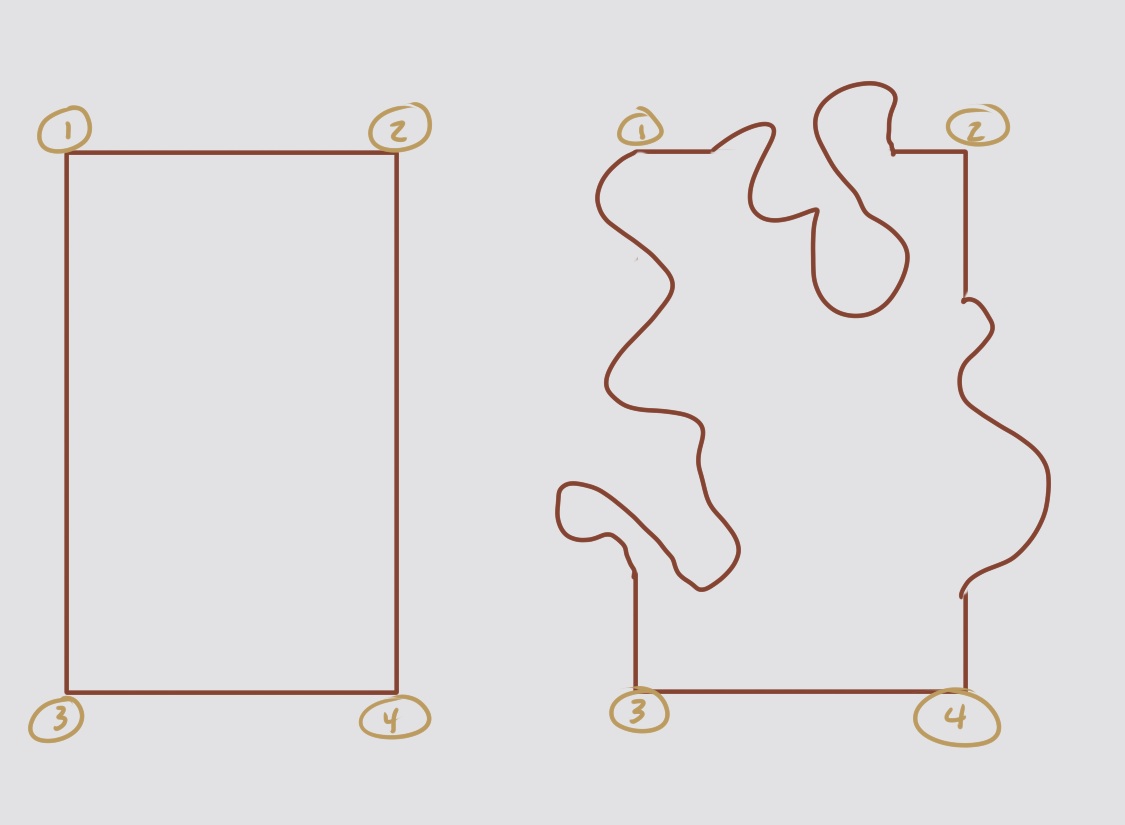
Third, especially when designing for a laser cutter, store the curves in your SVG file in such a way that the laser can go right from one curve to the next. For example, referring to the image above, store the 1-2 cut in the file, then the 2-4 cut, then the 4-3 cut, and finally the 3-1 cut. Storing them in another order, such as 1-2 3-4 1-3 2-4, would force the laser to slide around without cutting, which wastes time and can increase your cost. One of the tools offered by The Game Crafter (Component Studio) can help optimize these cuts.
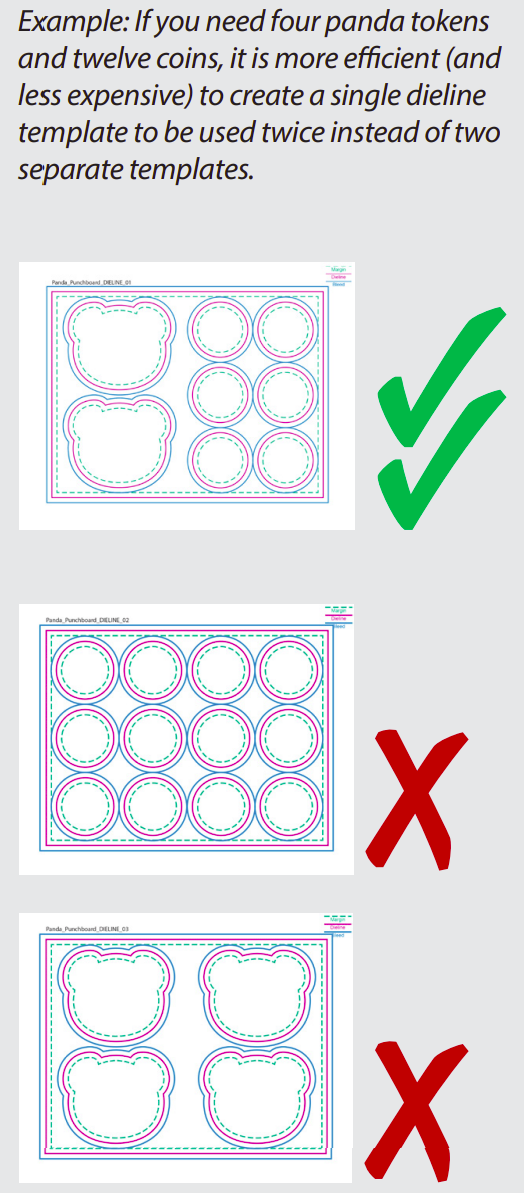
Finally, especially when designing for a die cutter, try to minimize the number of unique dies required. Panda offers the example below. Each unique slug die requires a setup cost. If you use the design indicated by the 2 red X marks, then Panda will have to create 2 die tools (one for each slug). But if you use the design with the checkmarks, then Panda only needs to create 1 die tool, which they can use to create 2 copies.
Notes to self
- Luer lock needle tip and painter’s tape when gluing prototypes
- TGC medium punchout 8″ x 4.5″
- 3mm margins and bleeds
- Component Studio to optimize ordering of cuts